Orange Jam/
Within 30 minutes/
Zero Oil Recipes
Hi Friends,
Slowly oranges are disappearing from the market. I like this fruit and its colour very much. I also love its marmalade and jam. I love colorful things. Bright colors are my favorite. Since long i wanted to try this jam but was scared that how the bitterness of its peel and seeds would be removed from it. So went through lot of blogs and after searching so much i came to know that bitterness can be reduced by adding lemon juice it also act as preservative. Then i went ahead and made this jam. I was not aware that it was such a easy recipe to try. Only thing is there are few points which needs to be followed while making this jam as small negligence can ruin your jam. Once you will set your hands on this yummy spread then it would be really a breeze to make it. It took hardly 30 minutes to make this jam.
I enjoyed it as spread on bread. Kids also liked it. This time i made it in small quantity. Next time i will make it in large quantity. You can use this jam for ice cream, shakes, cake filling or topping, pie etc. This is healthy too as no preservative is there. Its lot more cheaper then market jams which are full of chemicals. So guys try your own jam and enjoy oranges anytime of the year. Hope you will like it.
Ingredients:-
Orange - 1 kg
Lemon- 1
Sugar-1 cup
Method:-
Grab your ingredients
keep a plate in the fridge to check the consistency
Peal off the skin of orange and white threads also
add them in a grinder or blander
cut half your lemons
squeeze them directly to the grinder
puree them
run it through sieve to extract juice out of it
pulp is remaining
juice is here
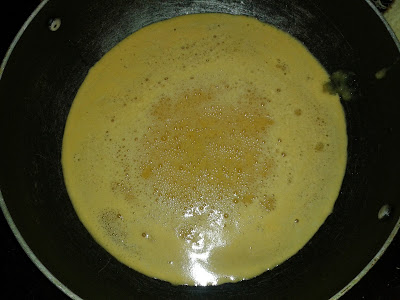
Now start heating it
Let it boil
and boil
add sugar after two boils
keep on stirring
it will start thickening
check after 7-8 minutes
its not done yet as it drop of jam spread itself
heat for more 2-3 minutes and check again
Now see how drop of jam thickened
Your jam is ready
cool it down completely a
nd add juice of half lemon
Store it in a sterilize bottle
ENJOYYYYYYY
I love this shiny color
Sending this to-
http://sumeesculinary.blogspot.in/2013/03/bon-vivant-13-kids-delight.html

http://www.tomatoblues.com/2013/03/your-kitchen-in-spring-event.html

http://www.sizzlingtastebuds.com/2013/03/summer-splash-new-event-giveaway.html

- Its advisable to remove seeds and white threads from orange segments before purring them. There would be less chances of jam become bitter.
- Jam become more thick after cooling so keep an eye on the consistency.
- Wash hands after peeling the oranges as bitterness of peel can ruin your jam.
- Add lemon juice at the end when jam is completely cooled down. mix well and store well.
- You can add whole lemon ad the the end after cooling down jam completely.
- Keep plate in freezer to check the consistency. Every time you need to check, take it out check and put it back in the freezer.
- Cook orange juice for 10 minutes and check the consistency if not done then cook again for two minutes and check again. Repeat the process untill you get the right consistency.
- Adjust the quantity of sugar, if oranges are sweet then you can add less sugar according to your taste.
- You an also juice the oranges in your juicer to lessen the work of purring and sieving, then directly start heating it.
- Preferably store jam in serialized glass bottle or container and keep in the fridge.
HOPE YOU WILL LIKE IT
Love
PariCash


loved this homemade orange jam..perfectly done!!!
ReplyDeletePerfectly made this yummy and delicious orange jam.
ReplyDeletetoday's post:
http://sanolisrecipies.blogspot.in/2013/03/hyderabadi-vegetable-dum-biryani.html
Nice post
ReplyDeletehttp://www.followfoodiee.com/
looks delicious..so easy to make at home... thanks for sharing..
ReplyDeletehttp://kitchendelicacies.blogspot.in/
I really like it when folks come together and share thoughts.
ReplyDeleteGreat site, stick with it!
my webpage; www.weeklyvolcano.com
I like your blog and the amazing clicks .I have just started following you and it would be highly encouraging if you may follow my blog too.
ReplyDeletehttp://cookingwithsapana.blogspot.com
Thanks
Regards
Sapana